Difficulty: Easy
Read Time: 10 min
Quick Tips
Difficulty: Easy
Read Time: 10 min
Before diving a deep dive into all the settings available for our tablet, let’s talk about the part that connects you to the digital world. The Pen!
Your pen is your most valuable tool!
When buying a new tablet you are always given a few spare nibs and also a few of a different kind of nibs. Some pens have a casing and the nibs are being stored in there along with the pen. Others come with a pen holder which can be opened and has the nibs store on the inside.
To replace a nib, take the little ring to pinch-grip the front end of the nib and pull it out of the pen. It should come out pretty easily. A new nib can simply push in into the pen and you are ready to get retouching or painting again.
Nibs wear off over time. Depending on your usage and your preferred pressure nibs can wear off rather quickly. So, make sure you have enough spare nibs at hand.
As there are different nibs built out of different materials wear also changes along with the materials. Some of them can also grind themselves flat and potentially scratch and damage your tablet’s surface. Your pen becoming scratchy might be a good indication to replace your nib.
The regular grip of a Wacom pen is rather slim and gives you access to two key commands, implemented as a rocker switch.
There are other grips available. A thick grip and an airbrush grip.
Not only do I recommend using these grips to mimic a more realistic feel when doing something other but retouching like painting or airbrushing but to always have two pens available at your desk with different grips. We are working long hours and having our fingers in the same exact position for such a long period of time transfers a lot of shocks into our knuckles and can cause a lot of stress. Switching up hand positions is very beneficial to your health in the long run. Different grips really help to avoid issues.
There is also an ergo grip available for the older generation of pens which gives you access to the rocker switch while other Wacom grips don’t. Maybe they will update the grip to fit the latest pens as well. See more info on the Ergo Grip. See more info on the Ergo Grip.
Wacom offers many unique features and tons of customization options for professionals. We will go over every single option and discuss how you can set things up to retouch efficiently and have the tablet adopt to your preferences than vice versa.
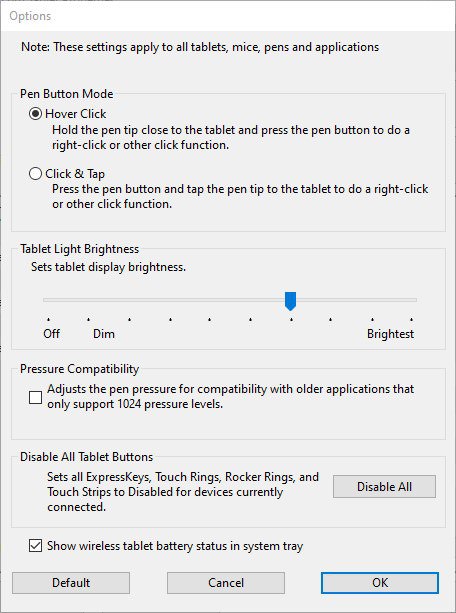
Before talking about the features in detail, let’s check out the general option in the Wacom Driver Properties Panel. On the bottom, you will find the OPTIONS button.
In the general Wacom tablet options, you can make adjustments to the pen button mode and change it from “hover click” to “click and tap” if you prefer it that way.
More importantly, you want to make sure that “Pressure Compatibility” is checked off! Having this feature is great for compatibility with older software but will limit your pressure sensitivity steps to 1024 levels. Many modern Wacom tablets support many more sensitivity levels and you might want to make use of all of them if you have paid a premium to get one of the Intuos pro tablets.
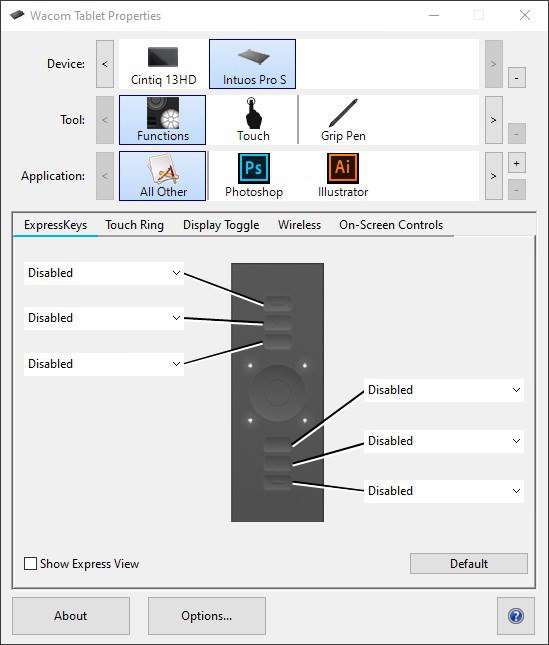
The first customization settings we are going to have a look at are the buttons and functions on the actual tablet. The Wacom Driver separates the used tools into Tablet functions and the different Pens or Touch functions you might want to customize all different from each other.
Starting with the buttons on the tablet itself, Wacom calls them Express Keys. On a Wacom Intuos Pro you have six express keys, each key can be associated with a specific input command.
Here is an overview of the most common functions that can be assigned to the express keys:
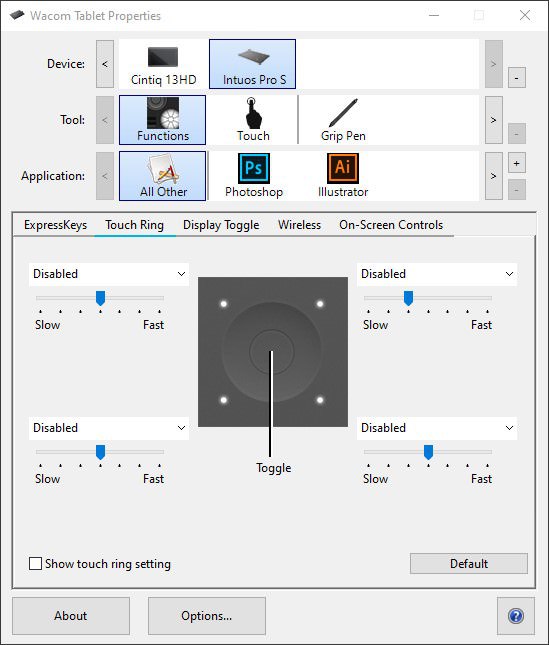
The second Tab for your Wacom Tablet functions is the Rocker Ring and the customizations to be done to its options.
The Rocker Ring is a touch sensitive ring and a toggle button in its middle. With the toggle button you switch between a feature and the rocker ring then is used to adjust a value dynamically.
Each feature then has a slider to select how responsive the rocker ring will react to your movements, giving you seven steps to adjust from slow to fast responsiveness.
Features to be controlled with the Wacom Rocker Ring:
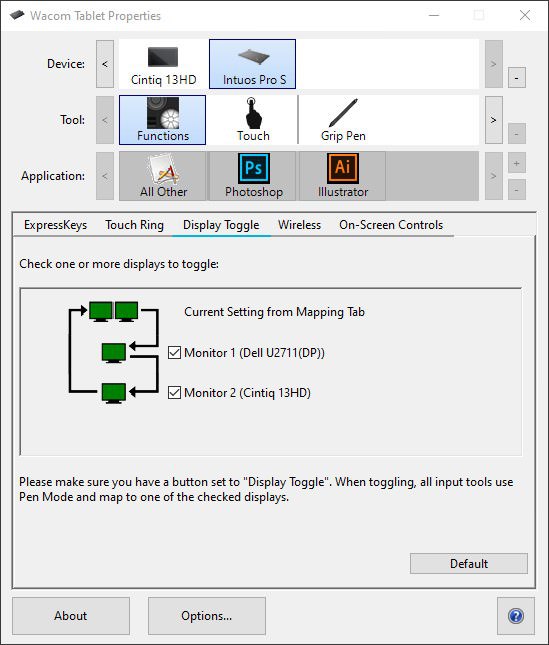
The Display Toggle function allows you to control your pointer either on just one monitor and switch between them or fluently transition between multiple screens.
Not only can you move over all screens and jump from controlling one screen to another, but also completely shut off a device. This can be handy if you are using different screens with different resolutions which would result in a different pointer speed from one monitor to another. Then it might be a good idea to just work on one monitor and use the other one just to reference off of later.
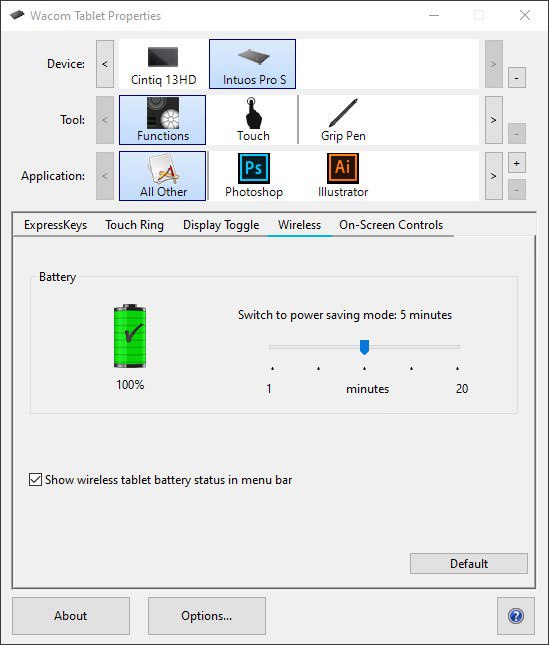
The wireless settings in your Wacom Tablet Properties panel allow for setting the power save mode. You can set the power saving mode to kick in after just one minute of not receiving inputs or up to 20 minutes standby. Set the value according to your usage and needs in terms of battery life.
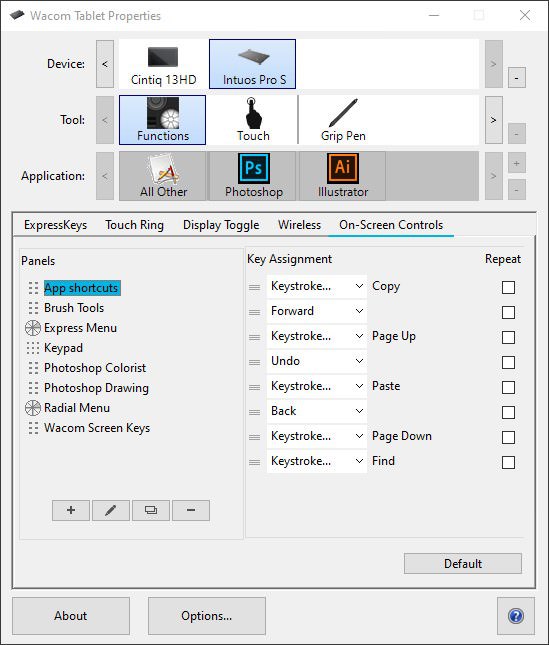
On-Screen controls are a great way to expand on the physical buttons present on your Wacom tablet. With on-screen control, you can set up panels to get access to more functions and bind a panel to a ket in the tablet. A panel can pop out a radial menu or a certain number of buttons either horizontally or vertically aligned.
You can create different panels for different purposes and then assign panels based on applications. This means, you can have a panel to adjust brushes pop out in photoshop and one to navigate a browser, all with the same button on your tablet.
Control options for touch input like: Pointer Speed, Double-Tap Time, Scrolling Speed or Pointer Acceleration.
The Wacom Tablet Properties panel allows assigning multi-touch gestures, swipe gestures, pinch zoom. Touch gestures can be accepted from one finger to five finger input gestures.
Wacom Tablet Preference Utility