Difficulty: Advanced
Welcome to our first retouching critique. The intention of us doing these critiques is to help others grow as retouchers and to advance their skills. While giving feedback on a person by person basis is very time-consuming we will publish critiques for others to also benefit from the content.
So please, revise your workflow and images, maybe you are stuck in the same ways as others. Let’s get better together!
Today we will be reviewing a retouch by Martin. He has sent in a before/after of an image shot by William Clark.
Of course, we are providing free practice files for you to practice your retouching on: Get Free RAW Files.
What You Can Expect Out Of A Critique
Let me first introduce you to what you can expect to get out of our retouching critiques:
We will start by addressing all the changes that we can detect and we think are beneficial to the image. Then, at a later time, we will go over all the little mistakes which could be improved on and tweaks on how to get there. Please, don’t be encouraged! We all make mistakes and we all are here to learn from each other and grow. You might have different opinions and disagree with some decisions but in the end, learning also means to select advice. It is up to each and everyone how to weigh other’s opinions. But, as we have been asked for ours, we will do so.
What Has Been Done To The Image In The Retouching Process
Let us briefly talk about the changes made to the image which are beneficial.
Martin has successfully evened out color differences and harmonized the skin color. He has also gotten rid of a lot of blemishes and big skin pores. He also has filled in some hairs to make the eyebrows look more full.
Further, he has tried to correct the lips, but I will get to this later on again.
Martin seems to follow current makeup trends. Thus, he was trying to emulate the technique called strobing. Strobing means to put very prominent highlights onto the skin to make it look moist and shiny.
He has also increased the image’s contrast. Resulting in darker blacks and brighter whites. The increased contrast causes the appearance of more depth in the image.
What Could Be Improved In Martin’s Retouching Workflow?
Despite all the effort going into this retouch I would also like to address some flaws.
Some issues I found are very minor while others are less ideal when targeting higher-end clients. Of course, it all depends on the clients you are working for as they are the ones to please and who will have to pay you.
Retouching Eye Whites
The first change in the image I would like to address is the eye white. Their brightness level has reached an unnatural level. At the same time, we can see a sharp line appearing on the outer side of the eyeballs. I would reduce the effect and gradually paint it in following the natural gradation. Yet, luminance is not the only variable to take care of when brightening eyes. In the before image, we can clearly determine the yellow tint of the eye white. Martin has taken care of this and shifted the color balance to match his adjusted skin tones.
Adjusting Image Sharpness
Let’s talk about sharpness. The retouched image has been sharpened a lot. Some areas oversharpened. Sharpening artifacts showing up in the image, eyes, some skin texture. and also the lips
How to work with sharpening:
The best way to address sharpness is not to diminish image quality. Destructive retouching techniques and blending will result in such. Please, also keep in mind that sharpening the whole image will lead to increased noise levels. Fine texture can easily become more prominent and artifacts are likely to happen. The results are unnatural and dry looking skin.
In this edit, fine hairs which have not been noticeable in the before image now has become a disturbance.
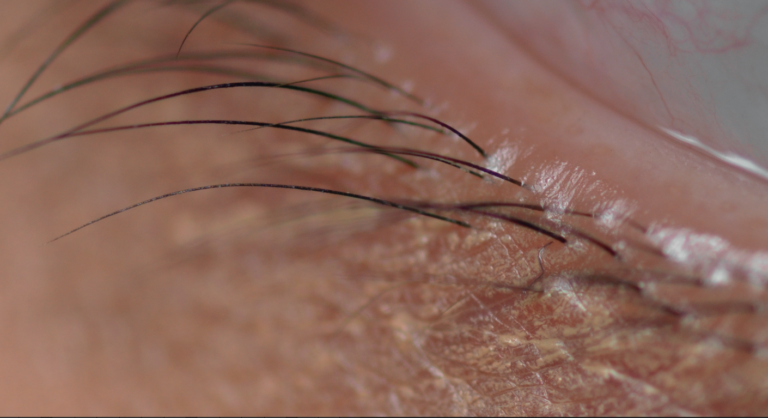
Retouching Eyebrows
Martin has filled in gaps within the eyebrows. But, the implementation could be better. When filling in hairs I would recommend matching filled in hair with the existing. Length, texture, and direction should always fit in with how existing hair is growing. The left eyebrow looks too painted and lacks some texture. To fix this I would copy a high pass from the other eyebrow and mirror-copy it over. Then adjust the opacity for it to look like real texture, blending in with more realism.
Retouching The Lip-Line
Another thing I want to talk about is how the correction of the lip-line has been approached.
As I have mentioned before, the sharpening has degraded the image here. With the sharpening applied, the texture now has become so prominent that the lips look rough and dry.
With the target audience in mind, we want lips in beauty images to look super fresh, smooth and healthy.
Now being very sharp straight lines it does not account for lips’ natural shape and curvature. In this case, the changes were done to the lip-line also created a flat and shapeless area. I have marked the area underneath the nose, along with the cheeks where this issue has become very obvious. The straight line of the lips mainly creates this visual appearance. I vouch for correcting discolorations along the lip line to make it more defined. A more natural integration of lips would be more pleasing to look at and look less artificial. <
Light Issues From Over-Retouching
By activating my help layer we can take a closer look at the skin texture and global light distribution. The increased contrast helps with detecting flaws and possible editing issues. In the circle on the left image, you can see a shadow. It exists because of looser skin being prone to gravity. On the edited version, we can still detect leftovers from Martin’s editing. The shadow has just been lessened and broadened. There are a few more areas showing leftovers of dodging and burning or frequency separation work. Taking a look at the eye bags, you can see the shadow and the highlight next to it, creating the saggy area. On the edited version, yet, these characteristics are still prominent and so is the eye bag. Smoothing out tones does only blend the areas of issue but does not get rid of them. There are a few more areas I would improve blending in.
- The cheek line
- underneath the eye
- the forehead
- the eye socket
Eye Socket
When it comes to correcting the eye socket I draw an imaginary line following the upper curve. Then I decide to correct the shadow into an upwards curve instead of leading it downwards. This edit helps to look young and fresh. But it also helps to create more dimension and definition.
Texture And Contrast
In this black and white view, it is easy to see how drastic the changes to the image are. I would suggest lessening the strong emphasis on creating highlights. Not only have they become super prominent but have also spread out and broadened. This makes the face look bigger than before. We can also see that, while the small texture has been preserved, the larger texture has disappeared. Here, the use of retouching techniques has lead to a very uniform texture pattern. Uniform texture reminds us of digital sculptures and appears unnatural to our eyes.
Bonus tip On Eyebrows
Another little bonus tip here. While Martin has filled in some hairs to fill in gaps, in my opinion, its shape could vastly be improved by cleaning up around the edges.
To Sum Things UP
Now that we have discussed how Martin has retouched his image we can draw conclusions on the techniques used and qualify the outcome. We have talked about a lot of techniques, changes, and improvements:
- eye white
- skin texture/lack of skin texture
- how to copy the existing texture
- skin color
- correcting lips
- correcting eyebrows
- sharpening / oversharpening
That’s it for today. I hope you guys had a great time going through this edit with me and also have learned something on the way.